Blog
DIY Wall Decor That Looks Professional
When it comes to home decor, walls are often the most overlooked space. Yet, they have the power to completely transform a room. Whether you’re renting or own your home, upgrading your walls with stylish DIY decor projects can instantly enhance the look and feel of any space. The good news is that creating professional-looking wall decor doesn’t require a large budget or expert craftsmanship. With a little creativity and the right tools, you can design stunning pieces that look like they came straight from a high-end store. Here’s your ultimate guide to DIY wall decor that looks professional and sophisticated.
1. Create a Statement Gallery Wall
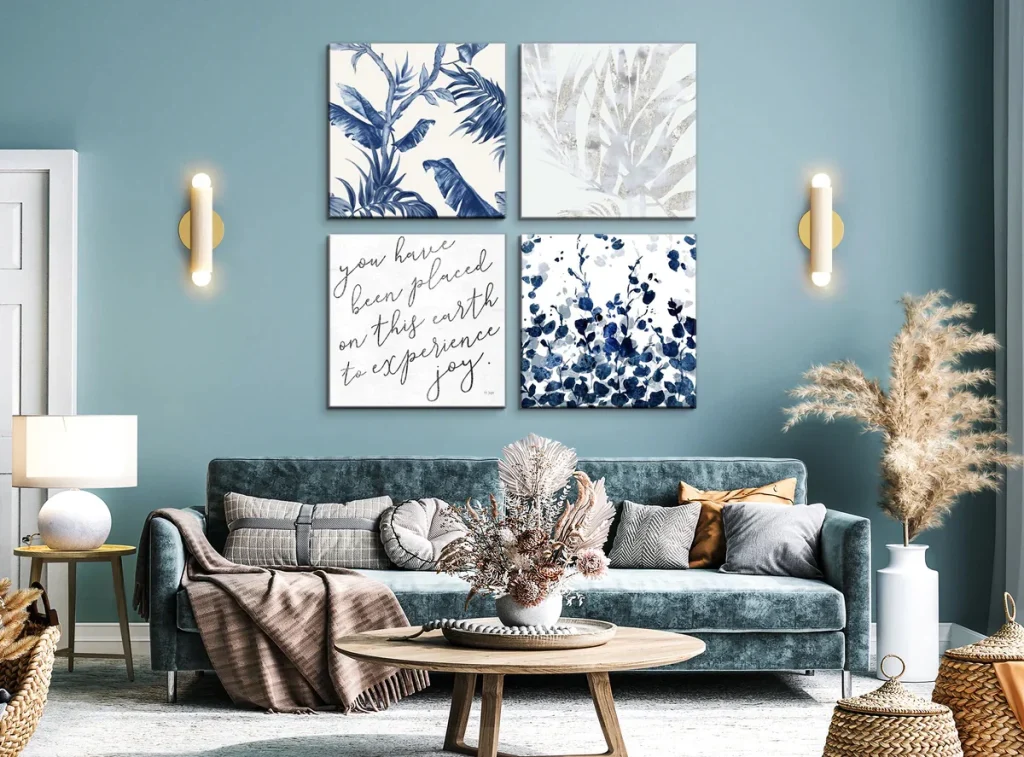
A gallery wall is an easy way to add personality and style to your walls while maintaining a cohesive look. Whether you opt for framed artwork, family photos, or a mix of both, a gallery wall can bring your space to life. The key to making your gallery wall look professional is thoughtful planning and symmetry.
Steps for a professional gallery wall:
- Choose a Theme or Color Scheme: While you don’t need to use identical frames, keeping a consistent color palette or theme (such as nature, black-and-white photography, or abstract art) helps tie everything together.
- Vary the Frame Sizes: Mix large and small frames to create visual interest. Make sure the frames are spaced evenly for a more polished look.
- Use Template Paper: Before hanging your frames, cut out pieces of paper the size of your frames and tape them to the wall. This allows you to experiment with placement and spacing without committing to holes in the wall.
A well-organized gallery wall gives off a curated and sophisticated vibe, perfect for adding charm to your living room, hallway, or bedroom.

2. Install Floating Shelves for Display
Floating shelves are a fantastic way to display artwork, books, plants, and decorative objects without taking up floor space. This versatile DIY wall decor option offers both function and style. The clean lines and minimalist aesthetic of floating shelves make them look modern and professional, especially when organized thoughtfully.
Tips for a professional look:
- Use Simple, Sleek Shelves: Choose shelves in a neutral wood tone or white for a more polished, contemporary look. Avoid shelves that are overly ornate, as they can distract from the items you are displaying.
- Add Symmetry: Arrange your items in a balanced way. For example, place a vase on one shelf and a small sculpture on the other. Group items by size or color for a cohesive and elegant presentation.
- Play with Heights: Stack books, lean framed artwork against the wall, and mix in plants to add varying heights and depth.
Floating shelves offer a sleek, functional, and stylish way to decorate your walls and create a personalized, sophisticated space.
3. Try a DIY Woven Wall Hanging
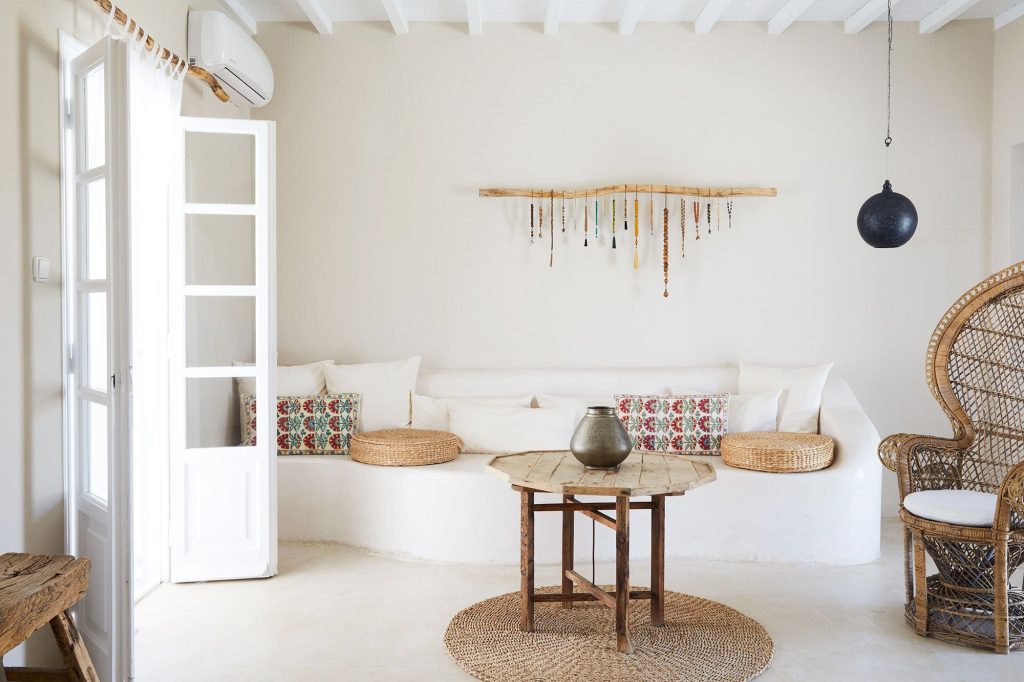
Woven wall hangings have gained immense popularity in recent years and add a cozy, bohemian feel to any room. They give a nod to texture and craftsmanship while offering a chic, artistic flair. Even if you’re new to weaving, creating a DIY woven wall hanging is surprisingly simple and can be done in a weekend.
How to make your own woven wall hanging:
- Select Your Materials: You’ll need a wooden dowel, yarn or string in different textures, and a few basic weaving tools like a tapestry needle and comb.
- Create a Simple Design: Start with a basic weave or choose a simple pattern like chevrons or stripes. The beauty of a woven wall hanging is in its imperfections, so don’t worry about making it perfect!
- Hang It with Style: Once your piece is complete, hang it at eye level to create a focal point in your space. Consider pairing it with neutral-toned furniture or plants to make it stand out even more.
A woven wall hanging adds depth and texture to your space, making it look more dynamic and curated while still maintaining a handmade charm.
4. Use Peel-and-Stick Wallpaper for a Bold Accent Wall
Peel-and-stick wallpaper has revolutionized DIY home decor, allowing anyone to create beautiful accent walls without the need for professional help. With so many designs to choose from—from geometric patterns to florals and abstract art—peel-and-stick wallpaper can instantly elevate the look of a room.
Tips for a professional finish:
- Choose a Bold Pattern for Accent Walls: To make a bold statement, opt for a high-contrast pattern, like black-and-white geometric shapes, for one wall. This creates an elegant focal point without overwhelming the room.
- Perfect the Application: Be sure to measure carefully before applying the wallpaper to avoid uneven seams or edges. Use a smoothing tool to get rid of air bubbles and ensure the wallpaper sticks properly.
- Pair It with Simple Decor: If you have a bold wallpaper design, balance it with minimalistic furniture and neutral accents to keep the look professional and not too busy.
Peel-and-stick wallpaper is a simple way to create a stunning, high-end accent wall that looks polished and sophisticated.
5. Make a DIY Framed Mirror
A well-placed mirror can enhance both the look and feel of your space by reflecting light and creating the illusion of a larger room. Framing a mirror yourself is a great way to add a personalized, professional touch to your walls. Not only does it look expensive, but it’s also a relatively simple project to complete.
Steps for a DIY framed mirror:
- Find a Basic Mirror: Start with a basic, frameless mirror that fits your space.
- Build a Frame: Using wooden molding, cut the pieces to fit the mirror and paint or stain them to match your decor. You can also use an old picture frame or repurpose wood from other projects for a rustic look.
- Attach the Frame: Use mirror adhesive to attach the frame to the mirror, ensuring everything is aligned properly.
Framed mirrors add elegance and sophistication to any room. A simple, rectangular mirror framed with dark wood or sleek metal gives a chic, professional look.

6. Create a DIY Photo Ledge
Photo ledges are a trendy and practical way to display artwork, family photos, or quotes on your walls. They offer the flexibility to swap out pictures as you like, making it easy to refresh your decor seasonally. A photo ledge is an elegant way to display your most cherished pieces while maintaining a minimalist, stylish vibe.
How to make a photo ledge:
- Gather Materials: You’ll need a long wooden board, brackets, screws, and a drill. For a modern touch, you can also choose a metal shelf.
- Install the Ledge: Mount the photo ledge on the wall at eye level. If you’re not sure where to place it, the center of the wall is typically a good spot.
- Style It: Once installed, style the ledge with framed photos, candles, plants, or decorative objects. Layer different-sized frames to create visual interest.
A photo ledge is a stylish and professional way to display your favorite moments, artwork, and keepsakes while maintaining a neat and sophisticated look.
7. Try a DIY Wall Mural
If you’re feeling adventurous, a wall mural can completely transform a space and add artistic flair. While professional murals can be expensive, creating your own with paint or peel-and-stick decals is a budget-friendly option. Whether it’s a nature-inspired design, geometric shapes, or abstract art, a mural is sure to make a statement in any room.
How to create your own mural:
- Choose Your Design: Decide on the style of mural you want. For beginners, start with something simple like stripes or abstract shapes. If you’re more confident, go for a nature scene or geometric pattern.
- Plan the Layout: Use painter’s tape to mark the areas for your mural before starting to paint. This will ensure straight lines and help you visualize how the design will look.
- Add Texture or Depth: Consider using different techniques, such as gradient shading, to add texture and depth to your mural.
A DIY wall mural brings character and individuality to your space, giving it an artistic and professional appearance.
Conclusion: Transform Your Walls with DIY Style
Transforming your walls with professional-looking DIY decor is an accessible and fun way to upgrade your space without spending a fortune. Whether you choose to create a gallery wall, install floating shelves, or try a more ambitious project like a mural, the key to achieving a polished look is to plan thoughtfully and use high-quality materials. With a little creativity and effort, you can create DIY wall decor that looks stylish, sophisticated, and professional. So, grab your tools and get started—your walls are waiting to be transformed!


